What inspection variables should be evaluated?
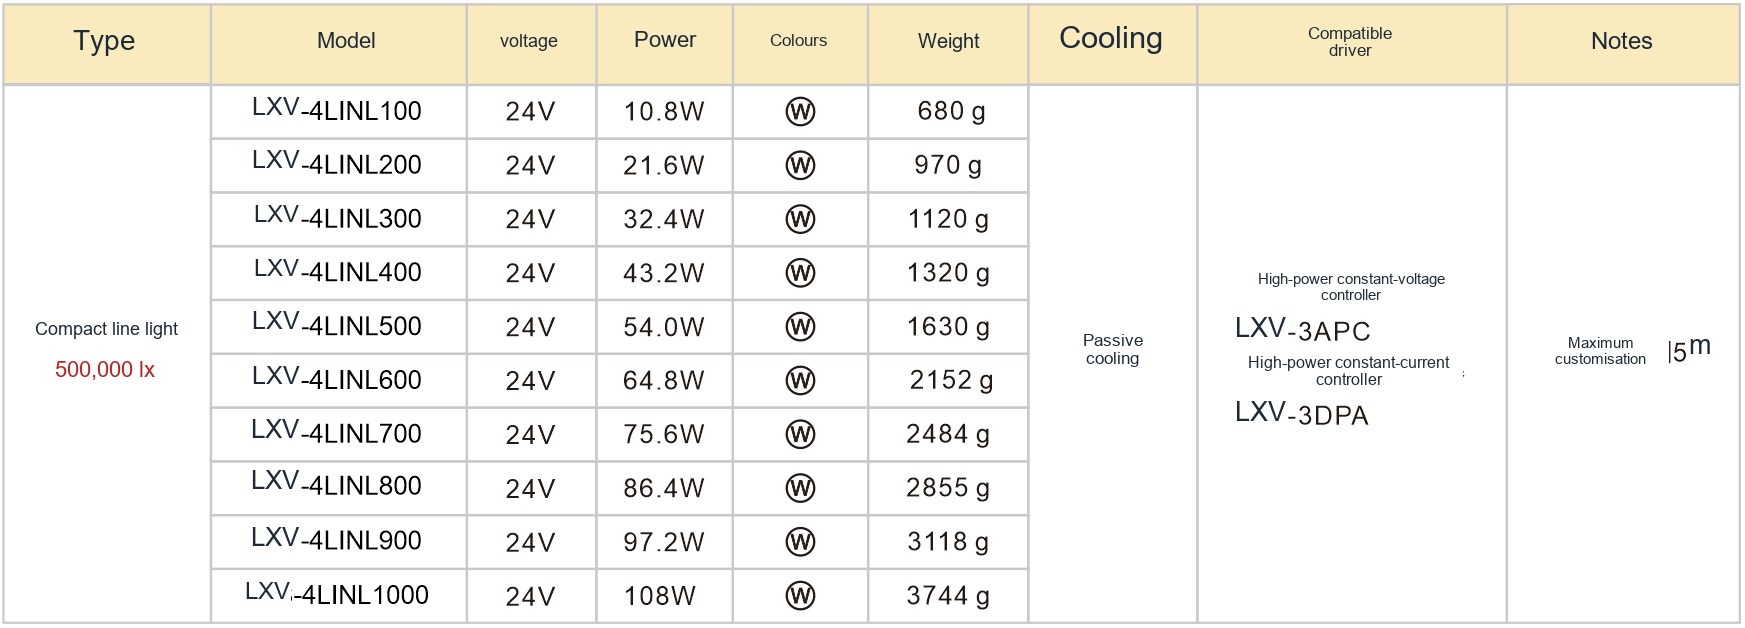
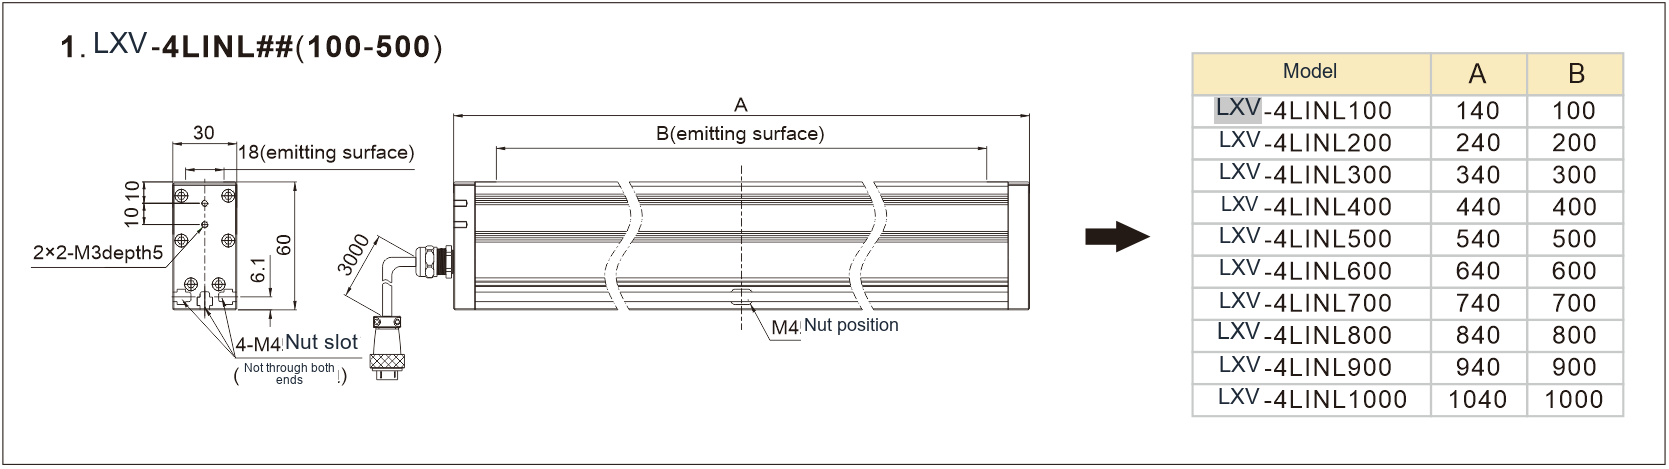
Check useful line length and cable direction first, then verify that the illuminated ends meet the exposure requirement.
What lighting geometry fits this inspection task?
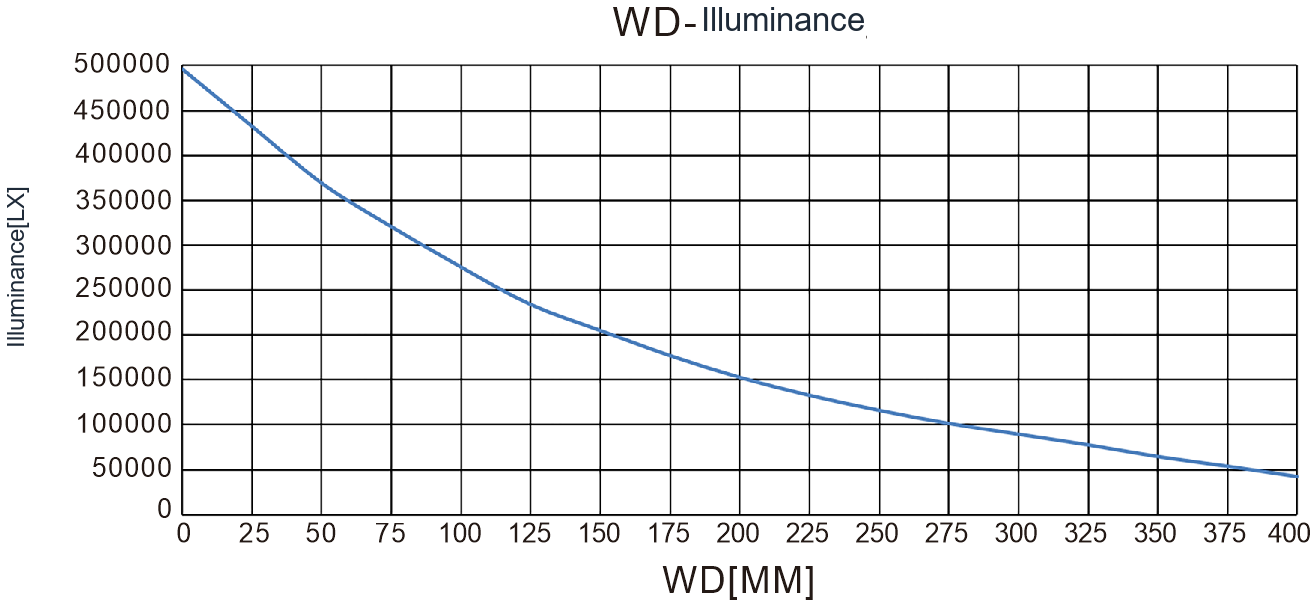
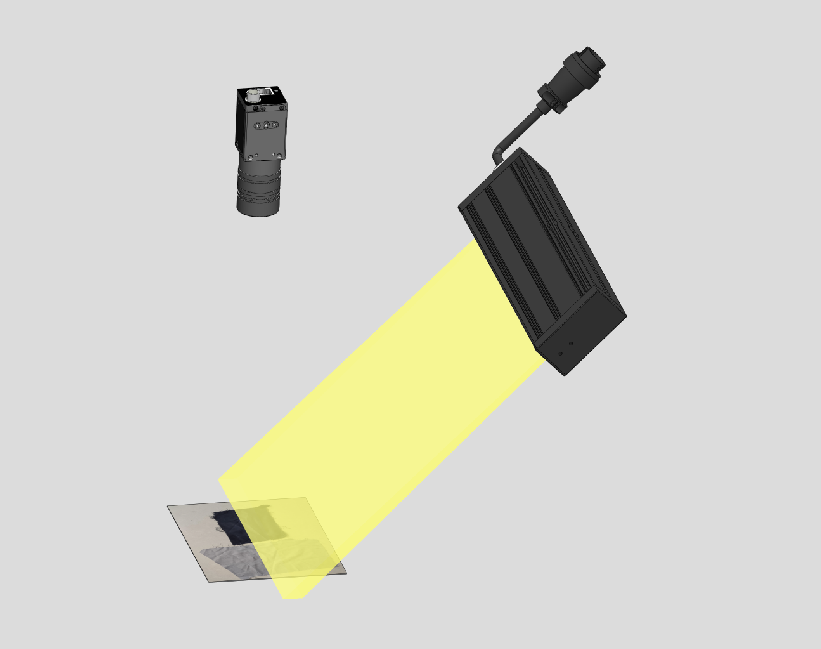
Align the illuminated line with the camera scan line and cover the complete inspection width. Compare brightness, working distance and line width together; housing length alone is not enough. Continuous motion also needs stable triggering and speed information.
Fix line rate and exposure, compare both ends with the centre, and check moving samples for smear and banding. Cooling affects sustained operation, so repeat captures after temperature stabilises. Record speed, mounting angle and controller settings to make the setup reproducible.
Related product family?
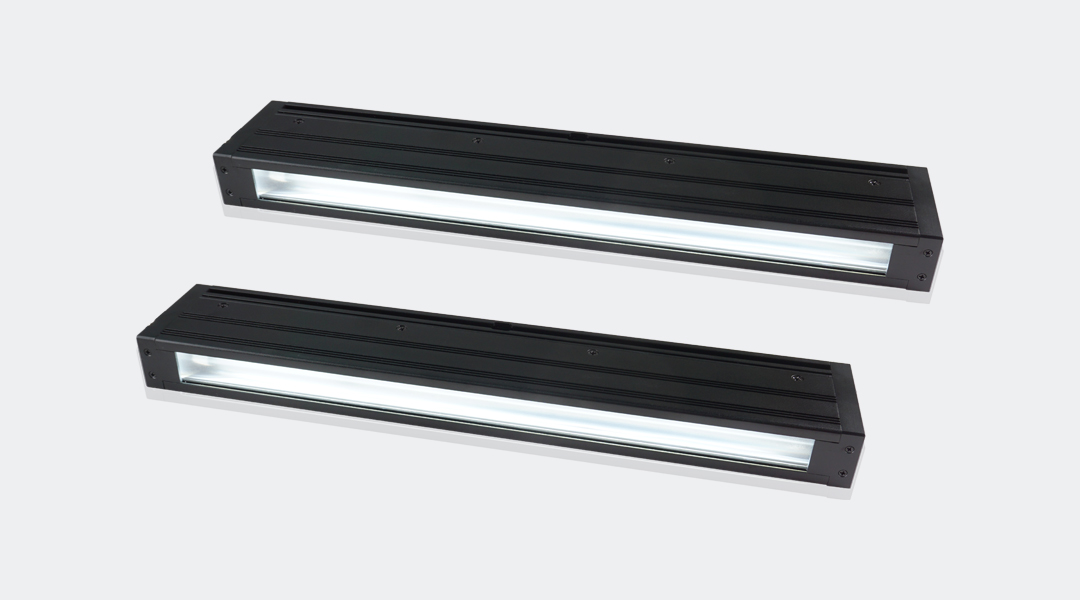
LXV-4LINL
A focused line of light for inspecting surfaces and edges.
Before choosing a configuration?
For selection, specify the field of view, smallest target feature, height variation, cycle time and installation space. Use the specific product page and drawing to verify electrical ratings, dimensions and compatibility.
Choosing a compact line-light layout?
Set the required illuminated length from the field of view and positional tolerance. Check beam width at the intended distance rather than choosing only by body length. Reserve space for mounting, cables and cooling clearance.
Measure edge-to-centre brightness with a uniform target and the production lens. Repeat after warm-up. Use exposure and gain settings that leave margin for darker samples without clipping bright regions.
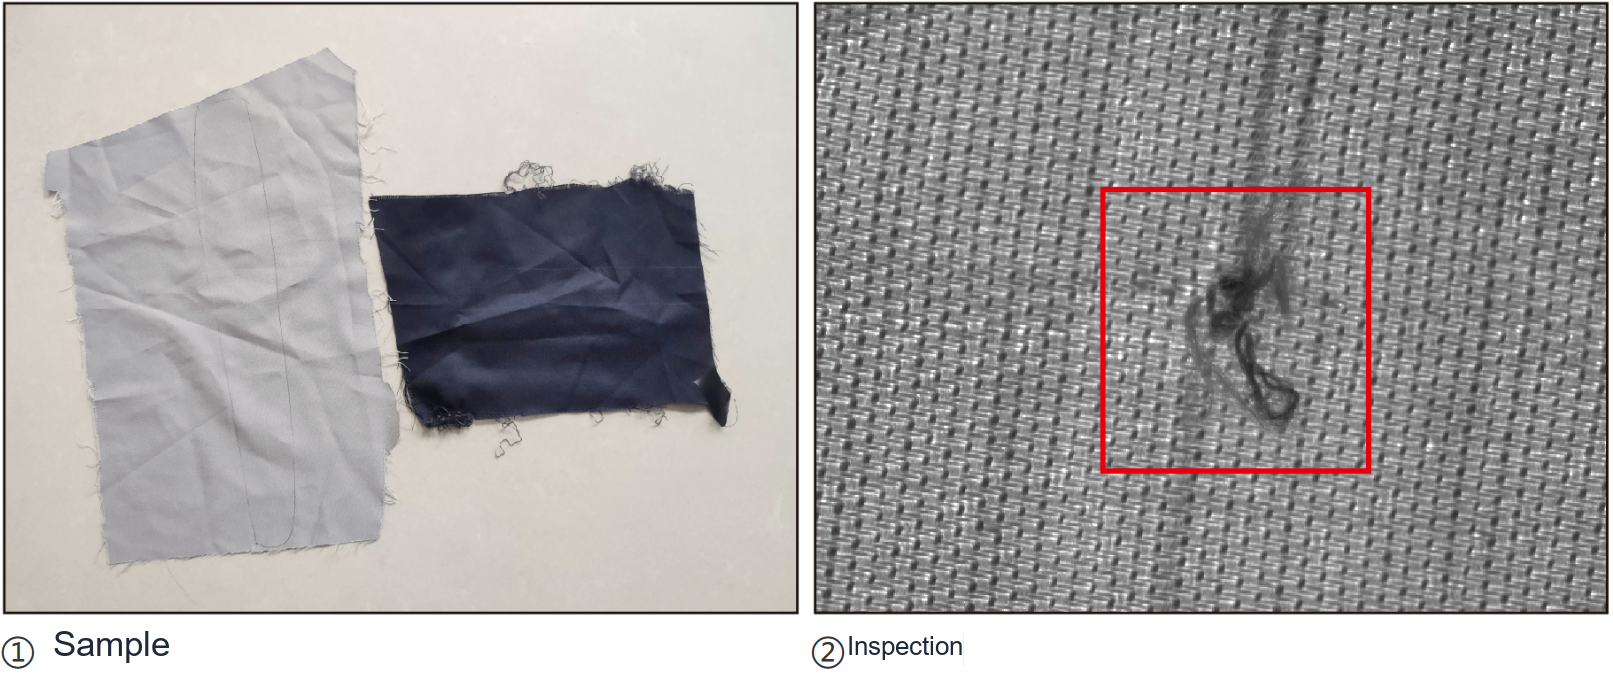
What do the optical setup and sample images show?